Introduction: Personalized Devotional Art using AI
Devotional photos jisme aap kisi deity (devta) ke sath khade hote hain, aajkal social media platforms par kafi trending hain. Navratri, Janmashtami ya Diwali ke shubh avsaron par log aisi personalized devotional photo banana pasand karte hain jisse unhe adhyatmik sukoon aur anand mile. Agar aur bhi devotional AI art prompts chahiye toh hamara Devotional Krishna Temple Prompt guide bhi dekhein. Aur realistic AI images ke liye 25 Best Nano Banana Prompts collection useful rahegi.
Is guide mein hum aapko ek behad premium, shant aur sammanjanak (respectful) personalized temple art prompt de rahe hain. Is prompt ka use karke aap AI generators me apni photo ya customized avatar kisi bhi deity ke sath create kar sakte hain.
The Personalized Devotional Prompt (Copy-Ready)
AI Prompt Box
A respectful devotional photo in a serene ancient temple setting. Place a realistic portrait of a young person (South Asian features, smiling warmly, wearing traditional Indian clothing) standing calmly beside a divine deity [Deity Name, e.g. Lord Shiva / Goddess Durga]. The deity has a soft warm glowing aura, gentle blessing pose, and elegant traditional details. Surrounding environment has ancient stone pillars, soft burning diyas, marigold flower garlands, and warm golden light ray beams. High-resolution, cinematic, spiritual and reverent mood.
Output Example — Prompt 1
Author upload required: add a real output for Prompt 1, describe what is visible, and record the tool and version used.
Tool: Author must supply · Version: Author must supply
How to Customize Your Name and Deity
Personalization: Prompt me `[Deity Name]` ko replace karke aap apne manpasand bhagwan (jaise Lord Krishna, Lord Rama, Hanuman Ji, ya Goddess Lakshmi) ka naam likhein.
Outfit details: 'Wearing a traditional white Kurta-Pyjama' (boys ke liye) ya 'wearing a beautiful red traditional saree' (girls ke liye) add karke aap kapdo ka style badal sakte hain.
Frequently Asked Questions (FAQs)
Q: How do I add my name? - A: Add the name in an image editor after generating the scene. This gives you control over spelling, script, and placement instead of depending on generated lettering.
Q: Will a text prompt reproduce my face? - A: Not reliably. A reference-photo or image-editing workflow may help if the service supports it, but the result still needs a resemblance check.
Prepare the reference photo
Choose a clear photograph of yourself with a visible face, even lighting, and a simple pose. A heavily filtered selfie with sunglasses gives the model less useful facial information. Use a copy rather than your only original. Before uploading, review the service's image handling and reference-photo settings. Only use another person's photograph with their permission, especially when the final image associates them with a religious practice.
Separate the real reference from the imagined setting. Your photo provides the facial reference; the temple, lighting, and devotional composition are creative additions. A prompt that only says young person with South Asian features creates a general character, not a reliable likeness of you. If your chosen service accepts only text, make an avatar illustration and describe it as such.
Worked example: a personal festival greeting
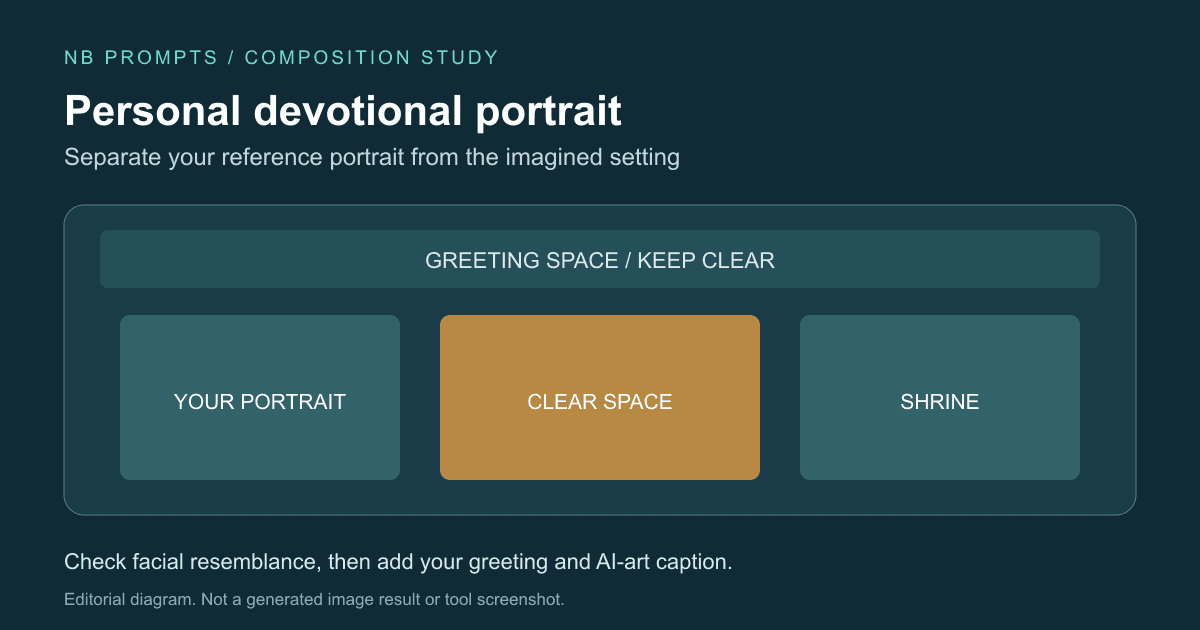
Suppose you want a greeting showing yourself in a cream kurta in the foreground, with a respectfully depicted shrine farther behind. First select a three-quarter portrait crop. Then describe the spatial relationship: person on the left, shrine behind and to the right, clear separation between both silhouettes, warm ambient light. This avoids asking the generator to fit overlapping faces and elaborate gestures into a small area.
A reference-editing instruction could be: Use the supplied photo as the facial reference for the person. Place them in a cream kurta, standing calmly with hands relaxed in a softly lit temple courtyard. Include a respectful shrine to [chosen deity] in the background. Keep the face clearly visible and leave space above for a greeting. This is a sample brief; reference fidelity depends on the service and must be checked in the result.
Review likeness before decorating the image
Compare the original and generated faces side by side. Look at the eye spacing, jaw shape, hairline, and expression rather than judging only whether the picture is attractive. A model may make a flattering but substantially different person. If the likeness is wrong, simplify the lighting and pose or return to a clearer reference; adding more jewellery or background detail will not address the problem.
Inspect the interaction between the person and shrine. Hands should not merge with ornaments, clothing should not intersect the pedestal, and the scale of the background should feel deliberate. Where editing controls are available, adjust one area at a time. Keep a version before each major revision so an improvement to the background does not force you to accept a worse face.
Make two crops for two uses
A square greeting needs enough room around the face to survive a feed preview. A vertical status image can place the greeting above the person, but the wording should remain clear of interface overlays. Test the crop before adding text. A close portrait and a full temple scene serve different purposes; do not squeeze both into a tiny profile picture.
Add the final name, festival greeting, and date manually. Read it back before sharing and check whether the background reduces contrast. Keep the caption straightforward, for example: AI-assisted devotional greeting created from my portrait. This distinguishes a personal creative image from a photograph of a real meeting, visit, or event. If you share someone else's image, get their approval of the finished depiction too.
The composition can be adapted to different generators, but reference controls and accepted parameters vary. Consult the chosen service's own documentation. For shape settings in Midjourney, see Midjourney aspect-ratio documentation; do not assume that its command syntax works elsewhere. Keep your unedited original separately and export a new copy for every final crop.